|
|
|
First off, this is only a tutorial, and I will not be held accountable for any screwup you do
which results in broken parts or non-functioning marker, so with that said, lets get started!
Be sure you have read the whole tutroial and understand it before starting to hack away at your grip.
The tools you'll need for converting a stock carbon fiber Automag grip frame to intelli feed are as follows:
Dremel tool with assortment of grinding bits, drill bits, and cutting disks.
Xacto Knife, pencil, or Marking tool
Soldering Iron
Glue gun
Luck!
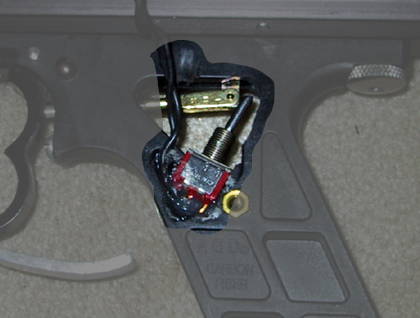
Heres what the finished product should look like:

To covert the grip, the holy ground is this:
Start off by removing the orignal rubber grips from the grip frame, but leaving the rest of the frame intact.
Next, Air up the gun so the sear is in the position that it would normally be in.
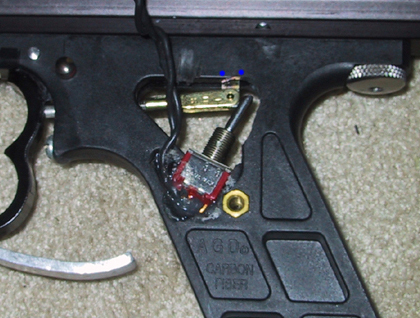
Now take you Xacto, pencil, pen or whatever and mark the grip frame as shown with the little blue dots.
Next, with the gun still aired up, take your switch of choice (which will have to be a single throw, momentary switch, available at any radio shack),
and line up the toggle of the switch as close to the sear as possible (Don't worry if its a little off, that will be fixed later)
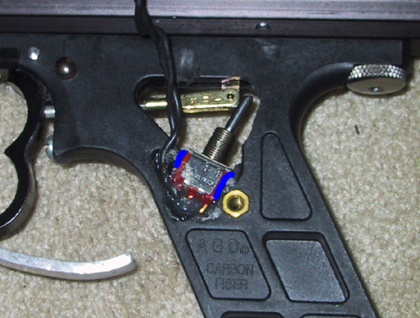
When you have it lined up mark where the sides of the switch is on the grip as indicated by the blue lines:
Now you should have a general idea of where the switch should be in order for the sear to trip it.
Next part is gonna take some time, so be sure not to rush. De-gas the marker, and remove the grip frame from the rest of the gun.
Now take your dremel tool, and using the various bits that you have clear out the space between
the 2 lines you drew for the switch, plus a little space for the bottom of the switch and wiring.
The blue lines indicate the general amount of space you'll need.

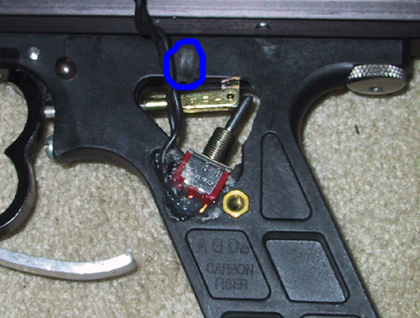
You will also need to clear out a space for the switchs motion, as indicated by the blue lines:

Also cut a groove for the wire from the switch, as indicated by the blue lines:
Now wasn't that fun? Well maybe not, but your switch should now be able to sit in that space with the wiring,
with all of it flush or below the grip frame surface, and be able to wiggle anywhere from being depressed by the sear to totally off.
Now put the whole marker together and air it up so you can get an accurate install on the switch
The next step will be user unique.
Take your glue gun and put a liberal amount of glue in the hole that you created.
Quickly press the switch into this puddle of glue, but also be sure to move it so it touchs the sear, but is not depressed.
Now let the glue harden, and finish it up with a little more glue, making sure the whole mess
is still flush with the frame. Put the grips back on the frame, and your done.
Voila! Your grip is now intellifeeded. To wire up the hopper or warp, just look for the tutorial at www.airgun.com
If there are any questions or comments, I can be reached at AznKid186@asianavenue.com or AIM SN: Aleeous Neo